Using the Compounding Polisher
Compounding will remove corrosion, surface discolorations and most sandpaper scratches. It will blend the edges of chips and deep scratches and make them less noticeable. When the compounding is done, the surface will be a mirror finish, but with serious swirl marks. The Cyclo polisher will remove the swirl marks and provide the finish polish.
Compounding will remove loose products of corrosion but it does not remove any base metal. Instead of removing base metal it reforms the aluminum surface. It moves metal around with a sort of plastic flow. To do this requires a lot of horsepower and right method of transferring this horsepower to the surface of the aluminum. The Cyclo polisher does not bring enough horsepower to the surface to do this. All serious surface defects must be removed by compounding.
Virtually all aluminum that has not been previously polished will have to be compounded if a mirror finish is desired. Even new Alclad aluminum has to be compounded or the reflected image will have a frosty tone if polished with the Cyclo polisher alone. Compounding will not remove the Alcad layer; it only reforms the mill finish into a mirror finish.
Unfortunately, our intuition serves us badly when it comes to compounding. It requires very different techniques than what people are used to using for compounding painted finishes. And the techniques shown in the Swift polishing video are not very effective for removing the types of serious surface flaws that are usually present in old aluminum.
Follow the instructions here carefully. Use the equipment shown. Do not improvise. Compound polishing causes more grief than any other step in the restoration process and it’s usually because the wrong equipment or techniques are being used.
Forget everything you know about detailing automotive paint. Compounding aluminum is totally different.
Using the Compounding Polisher
The hardware listed below is described in detail on the Compounding Polisher page.
- A half-inch slow-speed electric drill or variable speed right-angle car polisher.
- Wool or poly compounding bonnet. The purists insist on wool but we’ve tried them side-by- side on the same piece of aluminum and we can’t tell the difference.
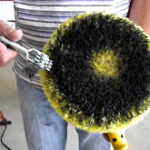
- A pad-cleaning tool, also called a “rake” or “spurring tool”. This is an essential item. The compounding pad will stop working as soon as it gets gummed up.
- Nuvite F7 polish, which is the medium coarse grade. This is probably the best all-around compounding polish. You can use Nuvite C on skins that are in quite good condition, but if the aluminum has surface defects (as most old aluminum does), then start with the F7. The coarsest grade, Nuvite G6, also works well but some users have noted that it is so coarse that it occasionally leaves scratches that are hard to remove with the subsequent Cyclo polishing. We’ve tried G6 and F7 side-by-side and they both work well but the F7 seems to keep going a bit longer.
The Nuvite F9 grade is also available. This is Nuvite’s most aggressive grade. It has hard, sharp particles that are much larger than those in the F7. Compounding with this grade will cut through corrosion much faster than with the F7 but it may also leave swirls and scratches that must be removed by compounding with one of the less aggressive grades before moving on to the Cyclo polisher. For most applications we recommend using the F7 rather than the F9.
- When the compounding is complete the Cyclo polisher and Nuvite F7 must be used to get rid of the swirl marks left by the compounder. This is followed by a finish polish using Nuvite S.
Compounding Procedure
1. Pick an area about 18″ by 18″ to work. Apply fingerprints of polish on 3″ centers over this area. These are tiny dabs of polish, not gobs. Compounding works best when the pad is quite dry. This is a direct contradiction to what our intuition tells us.If you are starting with a clean, dry pad, then you may need a bit more polish initially to get the pad started.
If you are starting with a clean, dry pad, then you may need a bit more polish initially to get the pad started.
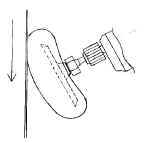
2. Work the surface in one direction only, typically from the top down. Slowly drag the pad down the surface at maybe 1/2″ per second (or even slower) with the pad angled as shown. Use as much pressure as is reasonably possible.
With the slow speed polisher the aluminum will get warm but not hot. If you are using a high-speed polisher you will have to move it faster down the surface to keep the aluminum from getting too hot.
3. You should see bright shiny metal where the pad has passed and a light line of Nuvite on either side where the pad has set down and lifted off.
Areas with deep corrosion or scratches will collect polish and be black, but the majority of the aluminum should be bright, even after just one pass.
If you don’t see bare metal you are using too much polish. Too much polish will gum up the pad and act as lubricant, preventing anything useful from happening. Dry is better.
It is important to take the time to experiment a bit with the amount of polish used. Purposely try using too little and too much to see how the compounder behaves. After a while it becomes easy to stay in the “zone”.
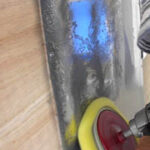
4. Move over 4 inches or so to the line of polish that has been deposited by the previous pass and make a pass down it. Continue on in this manner until you have worked your way across the selected area.
Do not move the pad in sweeping motions or back-and-forth as is done in car polishing, just down the surface in straight lines. Everything about compounding aluminum is pretty much the opposite of buffing out paint.
5. After every couple of passes, stop, put the drill in reverse, and use the pad cleaning tool to rake the pad. This separates the fibers on the pad. A gummed up pad will not work.
Aluminum with a thick layer of surface corrosion (see the trailer at the end of this page) will tend to gum up the pad no matter how much it is raked because of all of the loose surface material that it is picking up. This material can also scratch.
At the end of the day if your pad is gummed up, drop it in a bucket of hot water with lots of detergent ( generic TSP from the hardware store is best). Agitate with a bathroom plunger and let it soak for a day or two.
6. Add polish sparingly for subsequent passes. You will eventually develop a feel for when the pad is too dry. As a general rule, if you are seeing bright metal where the pad has been and are making very visible swirl marks, you are doing it right.
Important: Swirl marks and bright metal where the pad has been are the best indications that you are compounding effectively. No swirl marks means that you are either using too much or too little polish, or that you are moving the pad too quickly over the surface. No swirl marks means that you are not moving the aluminum around.
After one or two passes aluminum that has no surface damage will be bright and shiny. But repeated passes will be required to remove corrosion and scratches. Scratches from 400 grit and higher sandpaper will completely disappear but deep scratches will only have their edges rounded.
It might take as many as 10 passes to round the edges of a deep scratch.
7. If you are using a car-polisher type of compounding polisher, use the same general technique as the drill-type compounding polisher. If it is variable speed run it at the lowest speed possible. With higher speeds you will have to move the polisher down the surface more quickly than with the drill-type to keep the surface from getting too hot.
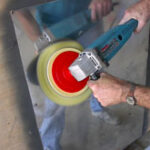
8. After removing all of the surface defects with the compounding polisher, use the Cyclo polisher and Nuvite F7 to remove the swirl marks. The result should be a mirror finish.
At this point take care to remove all residual polish from around rivet heads and seams. We recommend using microfiber towels and a solvent such as mineral spirits (paint thinner). It is very important to clean as you go. If residual polish is allowed to dry around rivet head and in seams, it will be very difficult to remove later.
There is some additional information on cleaning techniques at the end of the “Using the Cyclo Polisher” page.
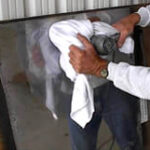
9. Then use the Cyclo polisher and Nuvite S to do the finish polish. This will provide the great depth and clarity of image. Use the finish polish sparingly to reduce the polish buildup around rivet heads and seams.
Visit the Using the Cyclo Polisher page to get detailed information on how to use this type of polisher.
Here are some photos taken during a polishing demonstration at an Airstream Rally.
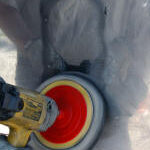
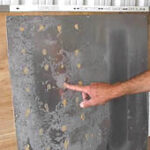
First pass. Note the bright metal where the pad has been and that a line of polish has been deposited on either side of pad.
After the first pass. Scratches and corroded areas will trap the polish and show up as black areas. Repeated passes will blend in the scratches and remove the corrosion,
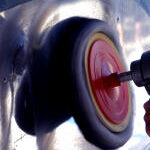
Start the second pass about 4″ over from the first pass. Go down the line of polish that was deposited on the first pass. Make additional passes until you are working an area that is about 18″ x 18″.
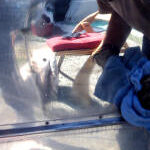
After about 20 minutes of compounding and 5 or 6 passes over each area the metal was uniformly clear and bright. We used the Cyclo polisher to remove the swirls before this photo was taken.
A Customers Comments: Here is a paragraph from a recent email from Chris F. He says it better than I can:
“My best advice (after reading website’s and Tom’s instructions) is to take a small piece at a time and work in one direction. Keep a good light on the subject. I apply the Nuvite from a little cup (This way if I spill it, I don’t lose the whole tub) and dab on the Nuvite with my index finger as needed. Clean your wool bonnet frequently in reverse! This keeps the fibers “fluffed” and cutting is easier. Experiment with the amount you use. Some of the instructions indicate that only a fingertip of compounding material is needed. I say it takes somewhat more than that. You don’t want to smear globs on the aluminum or it will not “cut”. When you get in the “Zone”, you will actually hear a little sizzle if you listen carefully. This is the machine, Nuvite, and pressure doing its job. It took me 3/4 of the trailer before I heard this but it is a very nice sound. It may take many passes but boy does that aluminum shine.”
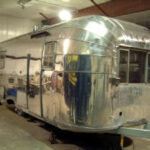
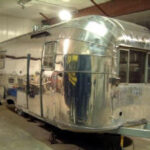
To prove that Chris knows what he is talking about, below are the “before” and “after” photos of Chris’s project. Only the compound polishing is done. The polishing with the Cyclo polisher has not been started. The compounding took Chris about 70 hours and used about one pound each of Nuvite F7 and C. He used the 1/2″ DeWalt drill and the 3M wool bonnets.
t would take most people quite a bit longer than 70 hours to do a project this size. But Chris said that he isn’t quite done and that he is fairly athletic. A hundred hours with the compounding polisher and maybe 50 hours with the Cyclo polisher would be more typical. And add another 50 hours for general detail work around windows, doors, etc.
Chris’s Compounding Tips:
- Clean and degrease each area before you start to compound. Chris used DEP Degreaser/Cleaner but any good cleaner will work. Work the surface with rags or a scrub brush to remove all loose material. Loose material can get into the pad and scratch.
- Have at least two wool bonnets. No matter how much you “rake” the pad Chris says that it will eventually get gummed up and matted. Change the pad when this happens because a matted pad will start to make deeper swirls into the aluminum.Chris washed the dirty pads in his washing machine with an extra rinse cycle using regular detergent plus some extra Oxy Clean. You can also put them in a bucket of hot water and detergent and agitate them with a bathroom plunger. The best pad cleaner is generic TSP (tri sodium phosphate) from the hardware store.
When putting the pads back on the machine, make sure they are centered so that they don’t wobble. - Keep a bright light on the work area. This allows you to see exactly what the pad is doing. Halogen floodlights work well and are available with adjustable stands at most hardware stores.
- Chris recommends building some scaffolding rather than trying to work from a ladder. He used two wide-base industrial type 8′ step ladders as scaffolding supports and two 2x6x10′ boards as scaffolding planks.
Chris recommends working from shoulder level to waist level only. Body position is everything, especially when working on scaffolding.
This page is available as a printer-friendly Adobe Acrobat .pdf file. Click here to open the .pdf file.
It would take most people quite a bit longer than 70 hours to do a project this size. But Chris said that he isn’t quite done and that he is fairly athletic. A hundred hours with the compounding polisher and maybe 50 hours with the Cyclo polisher would be more typical. And add another 50 hours for general detail work around windows, doors, etc.
Chris’s Compounding Tips:
- Clean and degrease each area before you start to compound. Chris used DEP Degreaser/Cleaner but any good cleaner will work. Work the surface with rags or a scrub brush to remove all loose material. Loose material can get into the pad and scratch.
- Have at least two wool bonnets. No matter how much you “rake” the pad Chris says that it will eventually get gummed up and matted. Change the pad when this happens because a matted pad will start to make deeper swirls into the aluminum.Chris washed the dirty pads in his washing machine with an extra rinse cycle using regular detergent plus some extra Oxy Clean. You can also put them in a bucket of hot water and detergent and agitate them with a bathroom plunger. The best pad cleaner is generic TSP (tri sodium phosphate) from the hardware store.
When putting the pads back on the machine, make sure they are centered so that they don’t wobble. - Keep a bright light on the work area. This allows you to see exactly what the pad is doing. Halogen floodlights work well and are available with adjustable stands at most hardware stores.
- Chris recommends building some scaffolding rather than trying to work from a ladder. He used two wide-base industrial type 8′ step ladders as scaffolding supports and two 2x6x10′ boards as scaffolding planks.
Chris recommends working from shoulder level to waist level only. Body position is everything, especially when working on scaffolding.
This page is available as a printer-friendly Adobe Acrobat .pdf file. Click here to open the .pdf file.
